How To Add A Translation with Ovesio AI (manually)

We will look into how you can generate an AI Translation with Ovesio AI. (manually)
This will be a test translation, manual one, from the main dashboard.
Once Ovesio is fully integrated into your ecommerce store, either through plugins or API, the translation will be automatic.
Step 0: Create an account
Go to Ovesio.com and create an account.
Step 1: Go to the Translation tab
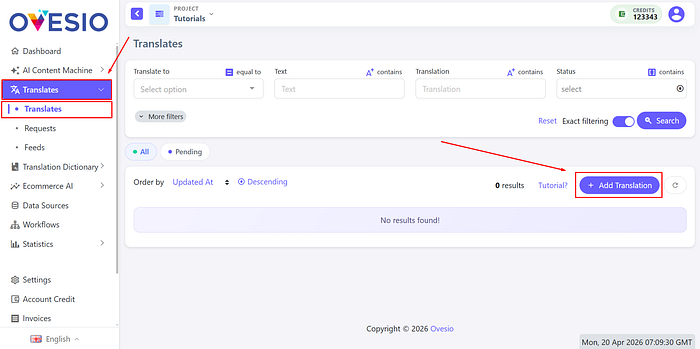
Go to the translation tab, and click on “Add Translation”
Step 2: Adding the translation
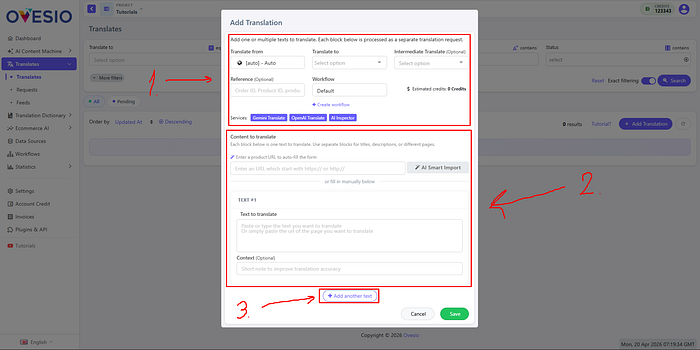
1st Section: The configuration
In this first section you can select:
- Translate From: the language of the untranslated text
- Translate To: the language(s) to translate the text into
- Intermediate Translate: a language bridge to guarantee a translation quality (let’s say you found out that translating from English into German provides a better quality then, French to German. So you will translate French -> English -> German)
- Refference: this is an advanced feature, mostly for devs
- Workflow: you can choose the AI models that will translate your text
- Estimated cost: here you will see the estimated cost of your translation request
- Services: here you will see all the services used in the current Workflow
2nd Section: Content to translate
In this section you can either:
- Enter the link to one of the products from your website
- Enter each text manually (title, description, specifications, are different pieces of text and need to added individually) using the plus button
Step 3: The Translation Is Loading
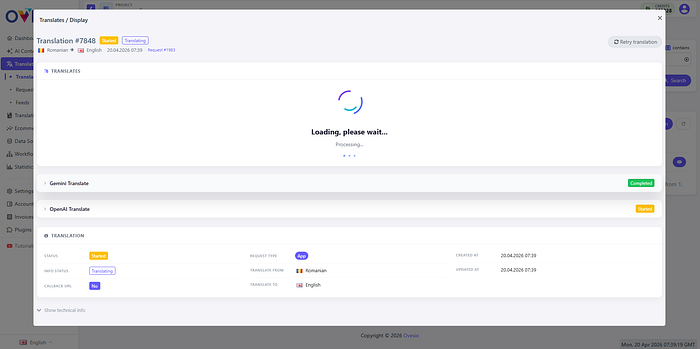
In a few seconds your translation will be ready.
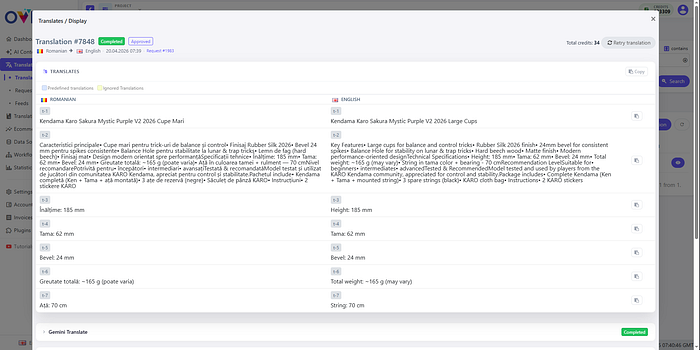
On the left is the original, and on the right is the translated version.
Under the AI Inspector section, we can see the beauty of Ovesio at work.
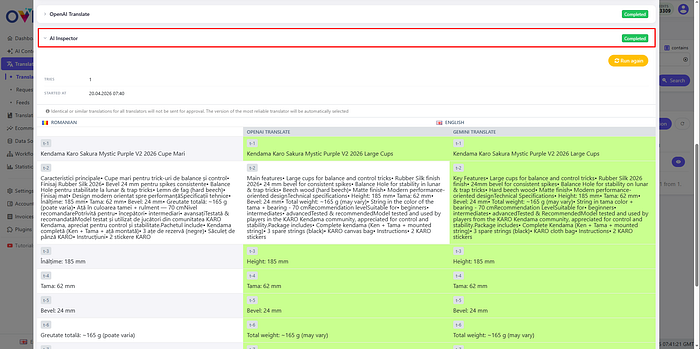
The same text got translated using two different AI models (you can use up to 4 at the same time, and you can choose among 10).
Once translated, this text is analyzed by the AI inspector, and then it compiles the most accurate translation possible with these AI models.
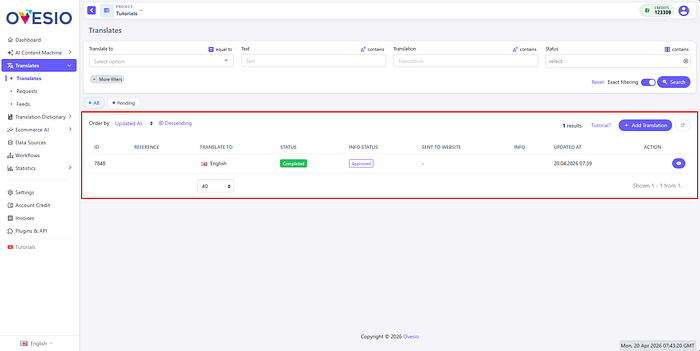
Step 4: View All Your Translations
Here you can see all your translations:
Step 5: Adding More AI Models
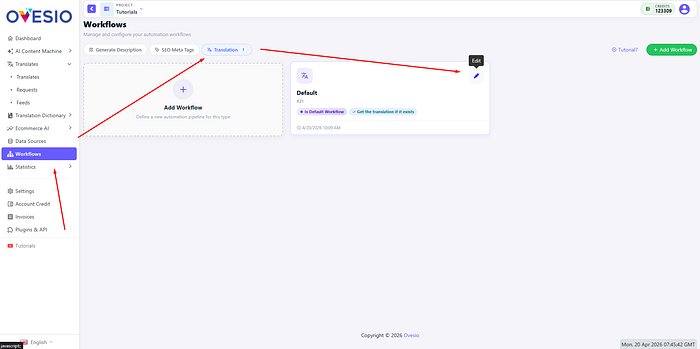
Click on “Workflows”.
Go to the “Translation Workflow” tab.
Go to your current workflow or create a new one.
Click on “Edit”.
Here you can choose which AI models to use in your translation:

Step 6: Going Automatic
To unlock the full potential of Ovesio, simply integrate it into your store. For most users, the installation process takes just a few clicks.
Here’s a link to all our plugins: https://ovesio.com/integrations
If your platform is not there yet, or if you have a custom-built store, here’s the link to our complete API documentation: https://docs.ovesio.com/