How To Install & Use The Ovesio AI Translation WordPress Plugin
The Ovesio AI Translation plugin for WordPress is 100% no-code and the installation process is simple.
Once it is installed, you will have the power to automatically translate products with only one click.
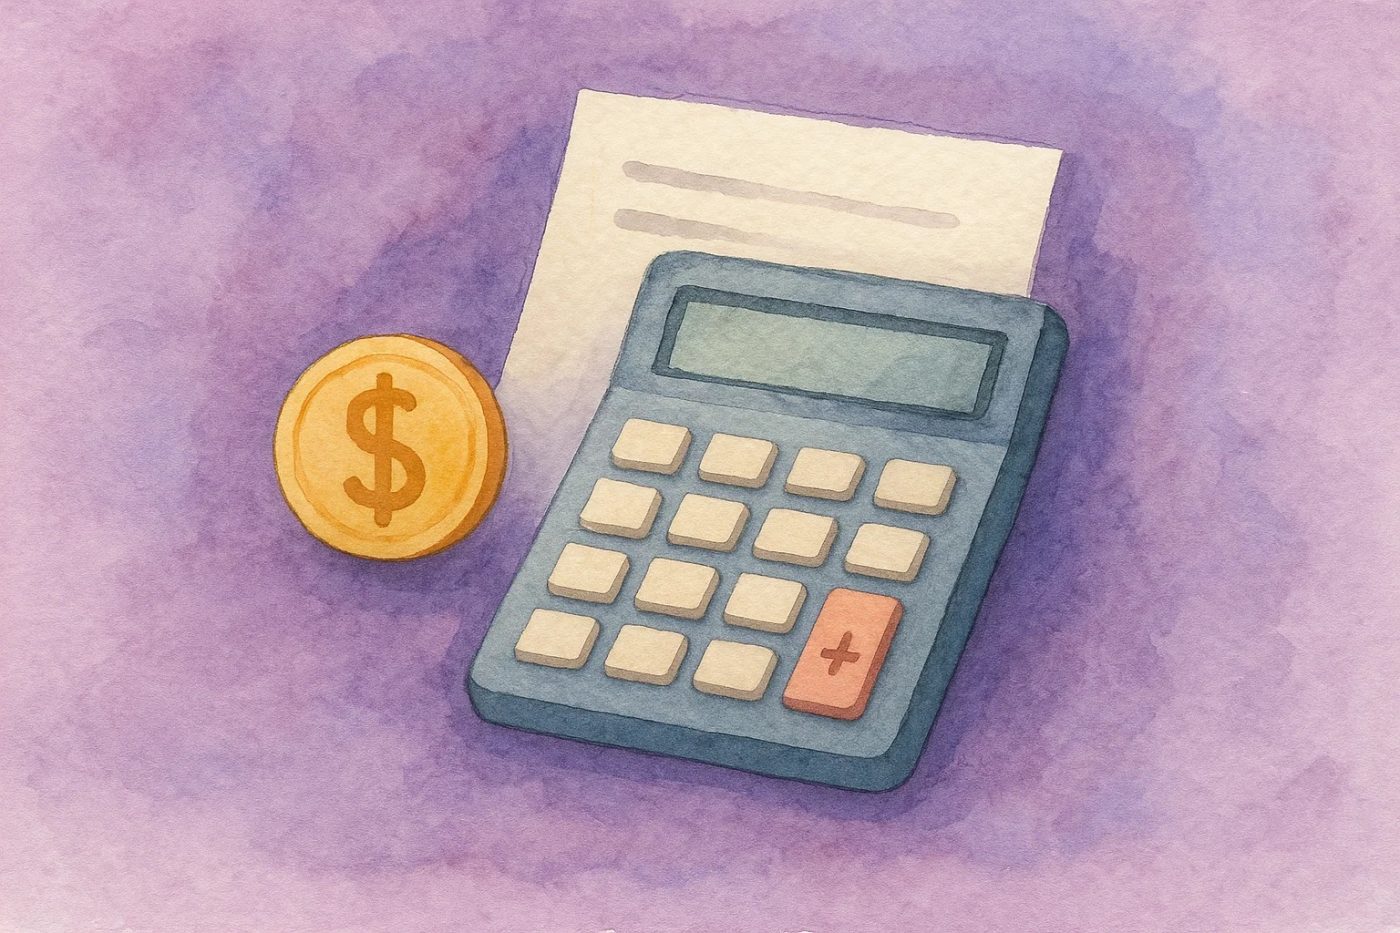
You’ll pretty much be able to expand your store to 29+ new markets in hours instead of months, if not years… and for only 1% of the cost of classic translation services.
Let’s jump right in!
Requirements:
To be able to use the Ovesio Plugin, you will need a few things:
- Ovesio.com account
- Polylang plugin installed
Ovesio uses Polylang because it works amazingly well and there’s no point in reinventing the wheel.
Step-by-Step Tutorial
Let’s walk together through the installation.
Step 0: Ovesio Account
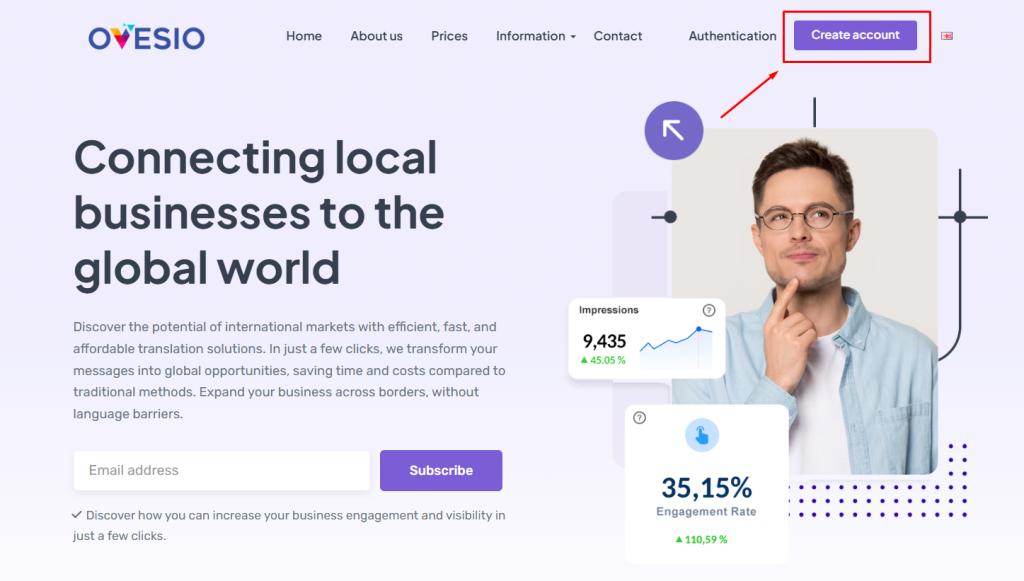
Go to the website of the best AI translation software on the market (which is Ovesio) then click “Create Account”
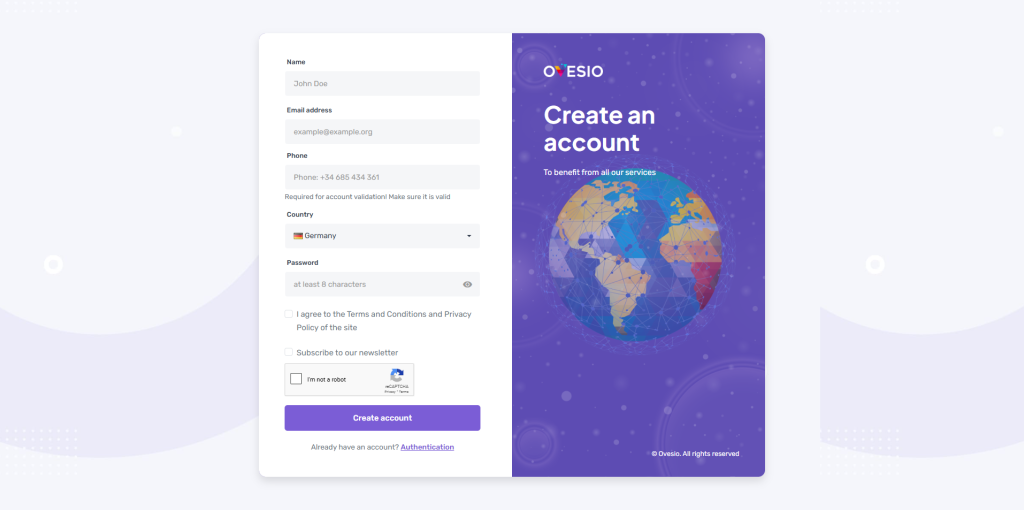
Enter all your account details, confirm your email and finish the account setup:
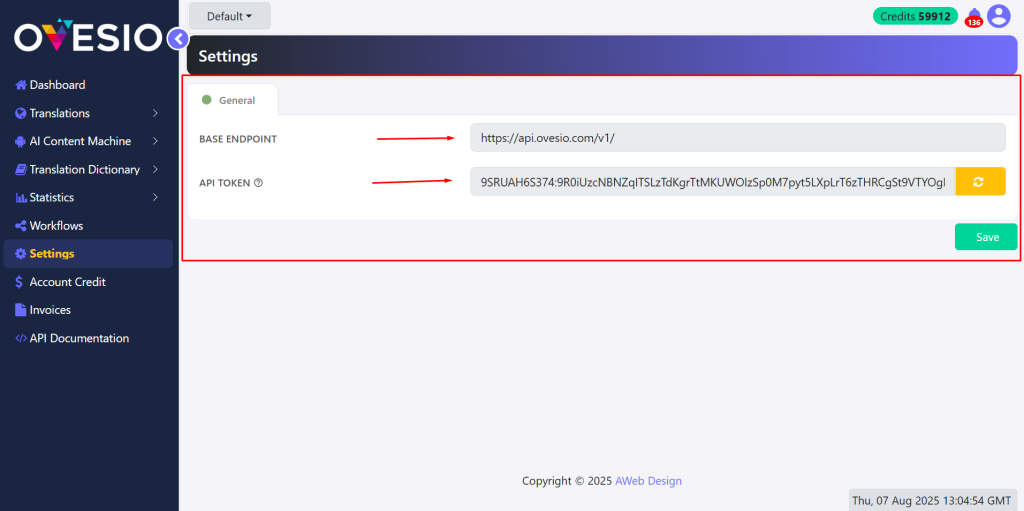
Once the get to the dashboard, go to “Settings”

On this page we will find the API Token and the Base Endpoint. Keep this tab open, because we will need it soon:
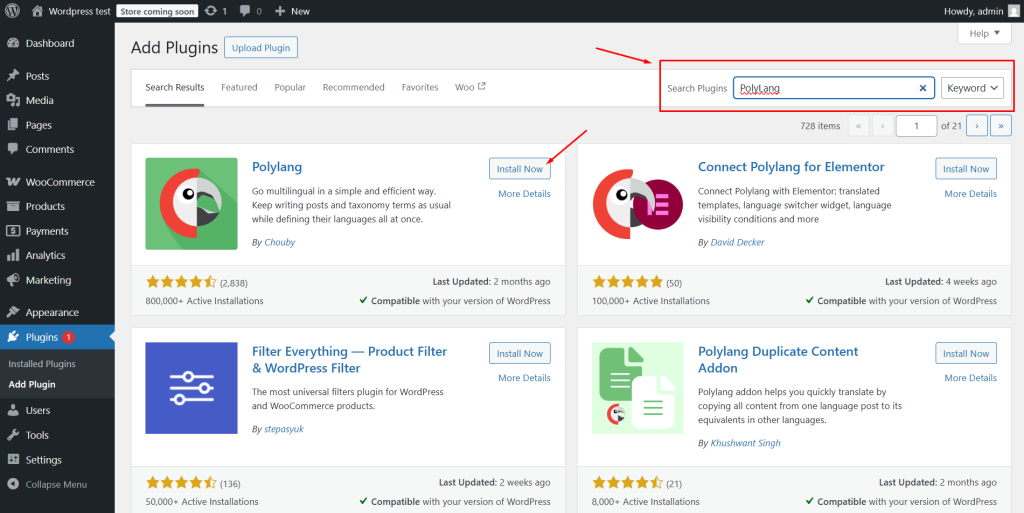
Step 1: Install PolyLang
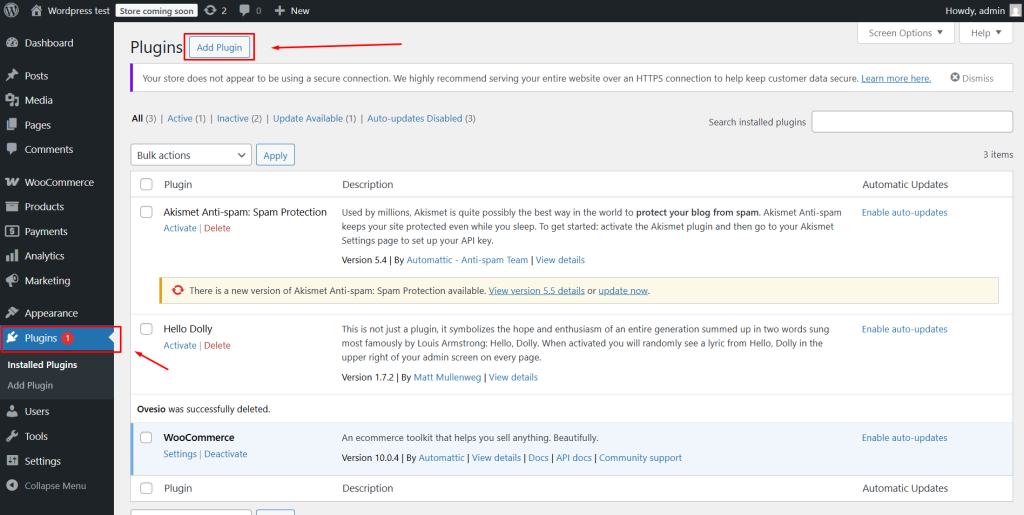
Go to WordPress -> Plugins -> Click on “Add Plugin”
In this window, click on search and type “PolyLang” and then click on “Install Now” then “Activate”
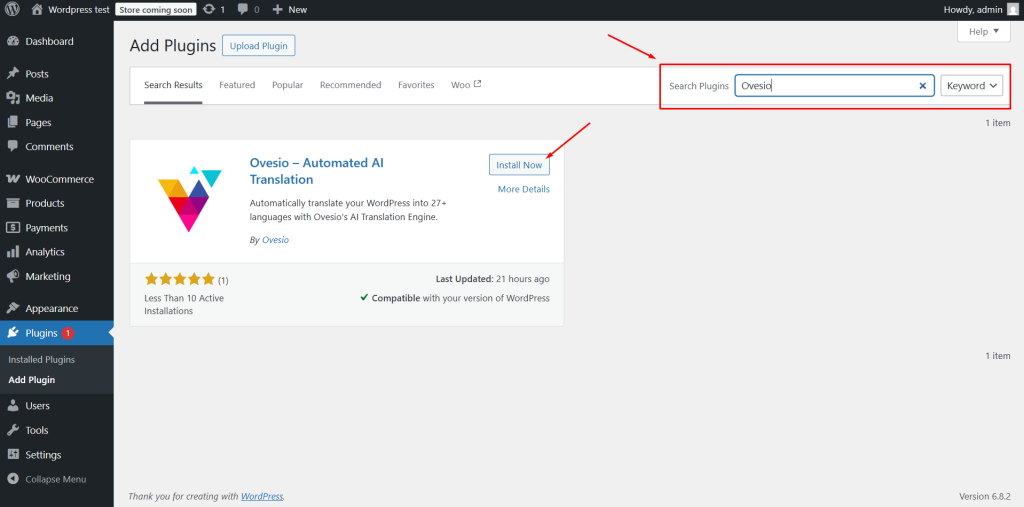
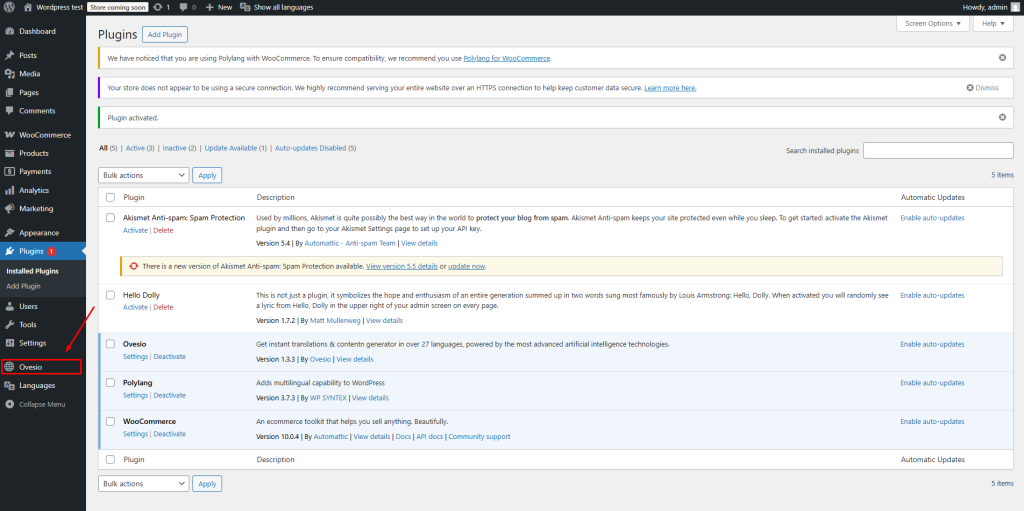
Step 2: Install Ovesio AI Translation WordPress Plugin
In this window, click on search and type “Ovesio” and then click on “Install Now” then “Activate”
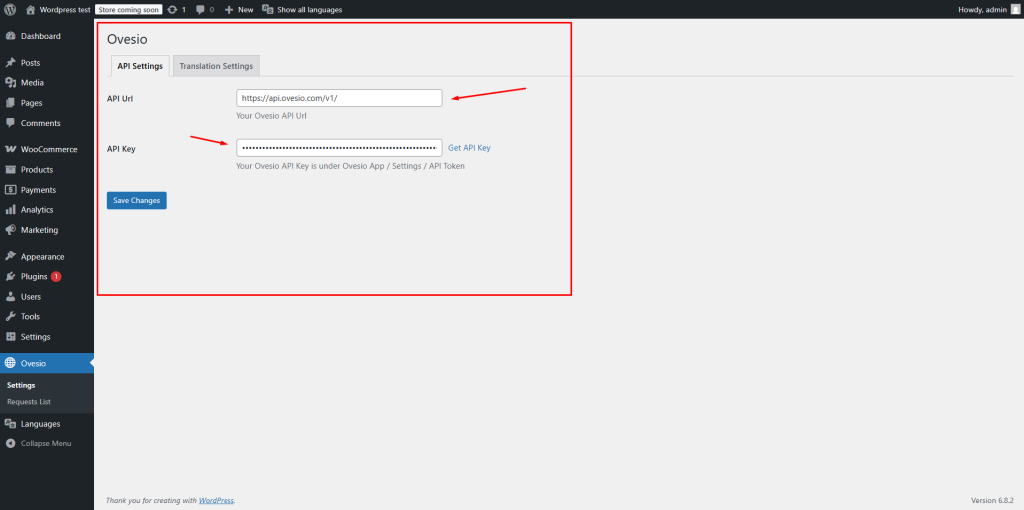
Now, go to the plugin page:
Here, put the Base Endpoint & the API Key/Token:
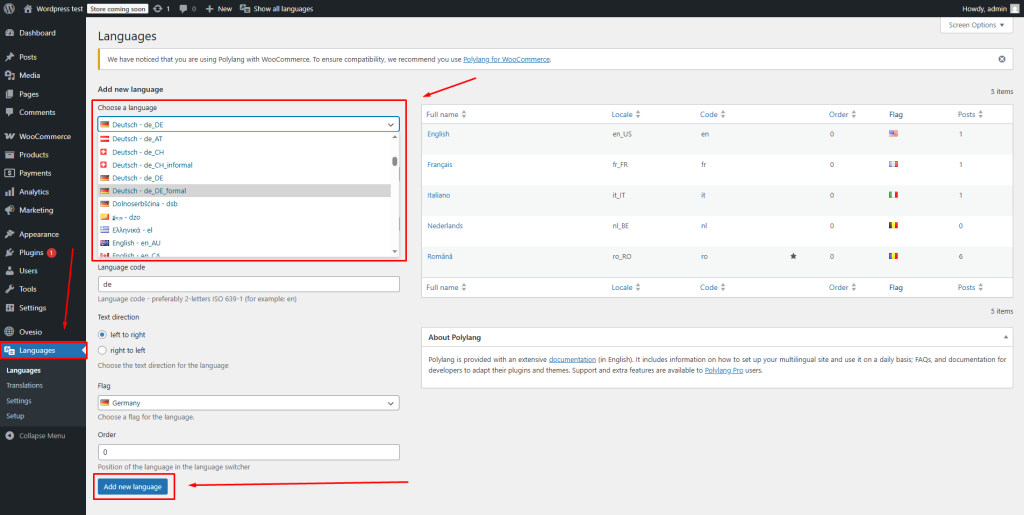
Step 3: Adding New Languages
Go to “Languages” -> Select the Language you want to add (one by one) -> Click “Add New Language”
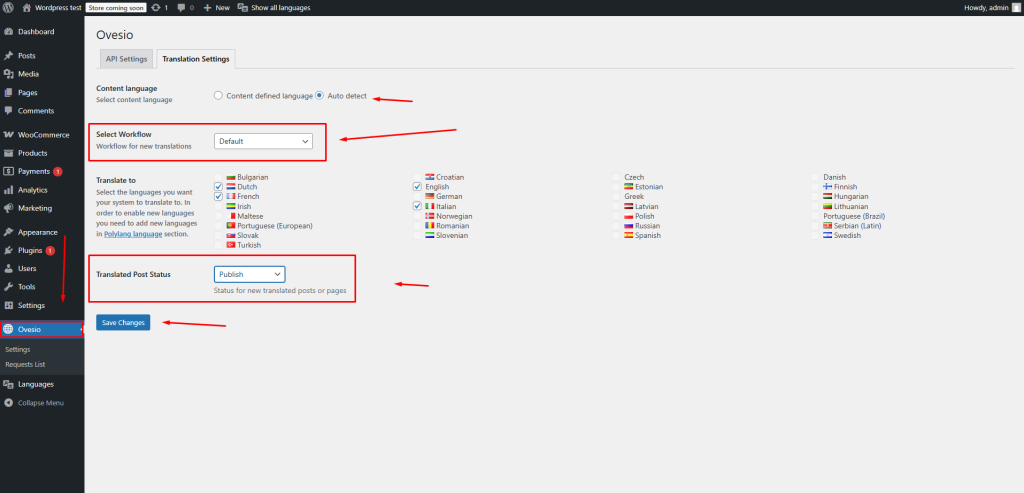
Go to the Ovesio tab on WordPress:
-> Select “Auto Detect” for the Content Language
-> Select the “Default” workflow
-> Check all the Language you want to translate into
-> Choose the “Translated Post Status”
Step 4: Workflows
Go to Ovesio.com to “Workflows” and click on “Edit Workflow” for the Default one:

Here, you can choose the AI Translators you will use when translating the WordPress products & posts.
The more translators you choose, the higher the quality of the output.
We recommend choosing at least 3, and activating the AI Inspector.
If you want to learn more about why there are 5 different translators, the engine, and the translation model behind Ovesio, click here: AI Translation
Btw, the Workflows tab will get an update soon and you will be able to do a lot more cool stuff in here.
Step 5: The Translation
To translate a post, go to “Posts” and then hover over the post you want to translate.
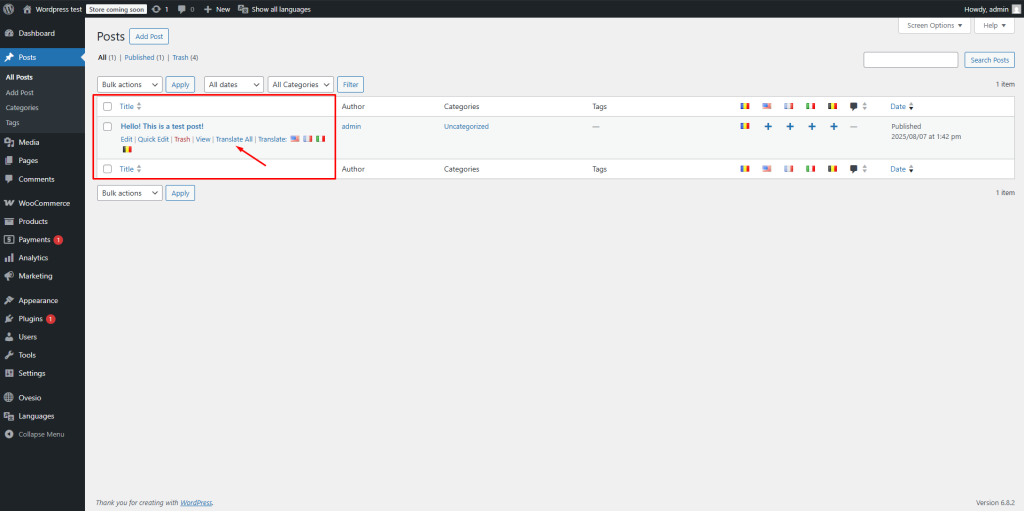
Here you can choose to either click on each flag individually, or click on “Translate All” and it will translate your posts into all the languages you checked previously.
For this example I will click on “Translate All”
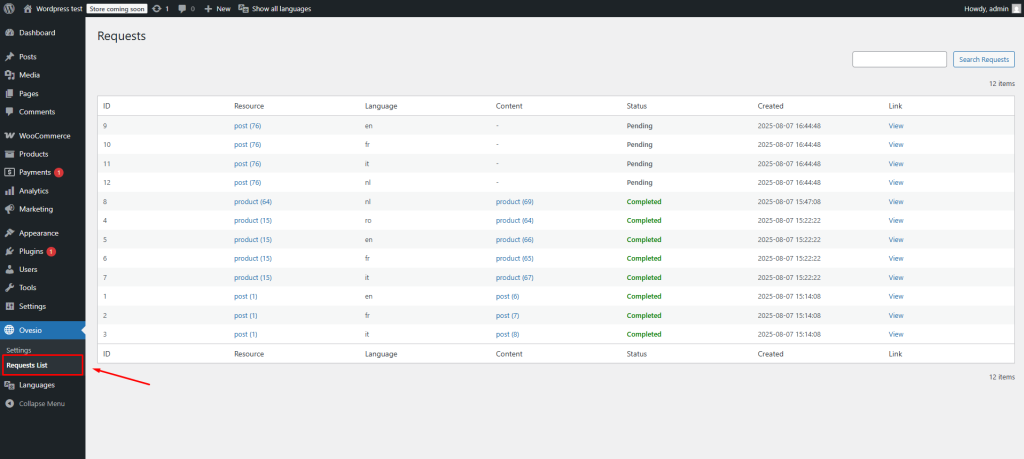
You can view the pending and completed translation in the “Requests List” tab in the Ovesio plugin:
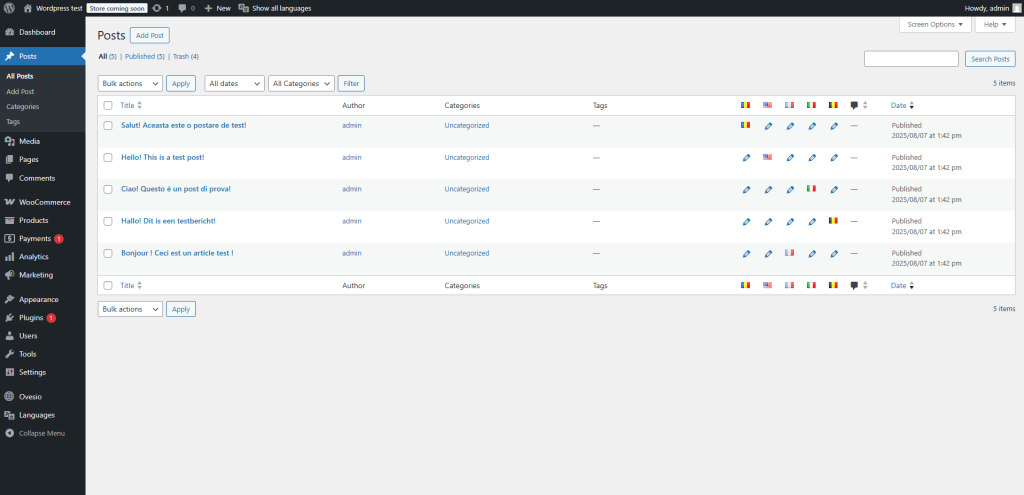
Once the Translation is completed, the new posts/pages/products will be added with the status you selected previously (Draft, Published, Pending Review)
Conclusion:
The process is exactly the same for every single element that can be translated:
- Pages
- Products
- Posts
- Categories
- Tags
If it has text, it can be translated.